Keeping your computer running smoothly depends heavily on whether your device drivers are up to date. Drivers are essential software components that allow your hardware — like graphics cards, printers, sound devices, and network adapters — to communicate effectively with your operating system. Outdated drivers can cause crashes, slow performance, and even hardware malfunctions. That’s where Driver Booster, a trusted driver updater from IObit, steps in to make the process effortless and instant.
This guide walks you through a complete step-by-step process for fixing outdated driver issues using Driver Booster, and explains why it’s one of the most reliable solutions for PC maintenance and performance optimization.
Step-by-Step Guide to Fixing Outdated Drivers with Driver Booster
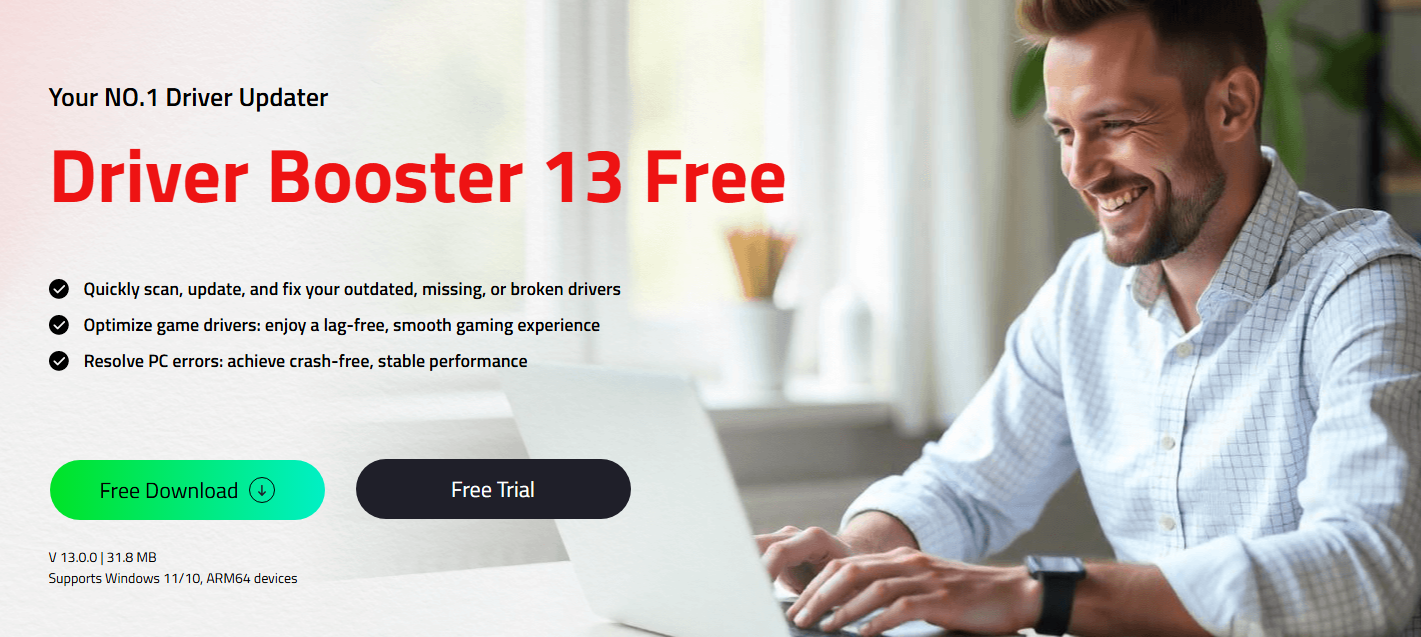
The latest Driver Booster 13 Free version includes all essential tools for keeping your system healthy without any cost. Here’s how to make the most of it:
Step 1: Download and Install
Begin by visiting the official Driver Booster page and downloading the installer. Once downloaded, run the setup file and follow the installation prompts. The program installs quickly and requires minimal system resources.
When installation completes, launch Driver Booster. It automatically identifies your hardware and prepares your system for a comprehensive scan. The intuitive dashboard makes it simple, even for beginners, to start managing their drivers effectively.
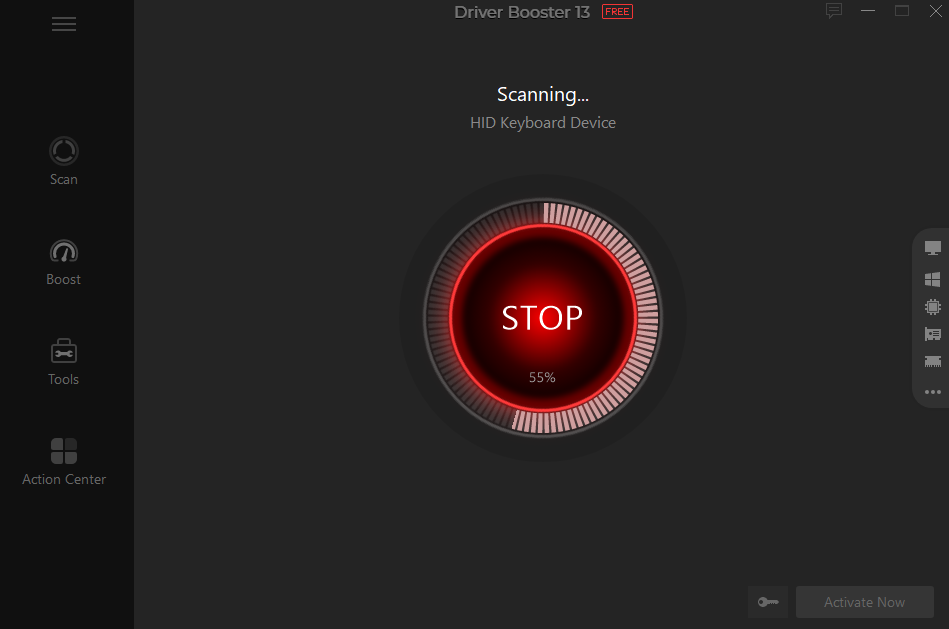
Step 2: Run a System Scan
Or, you can click the “Scan” button on the main interface. Driver Booster will immediately start scanning your PC for outdated, missing, or faulty drivers.
Within a few moments, the tool provides a detailed report showing all drivers that need attention. It identifies not only outdated drivers but also game components and device errors, ensuring full system coverage.
The scan results are categorized by device type, version number, and update status — giving you complete transparency before making any updates.
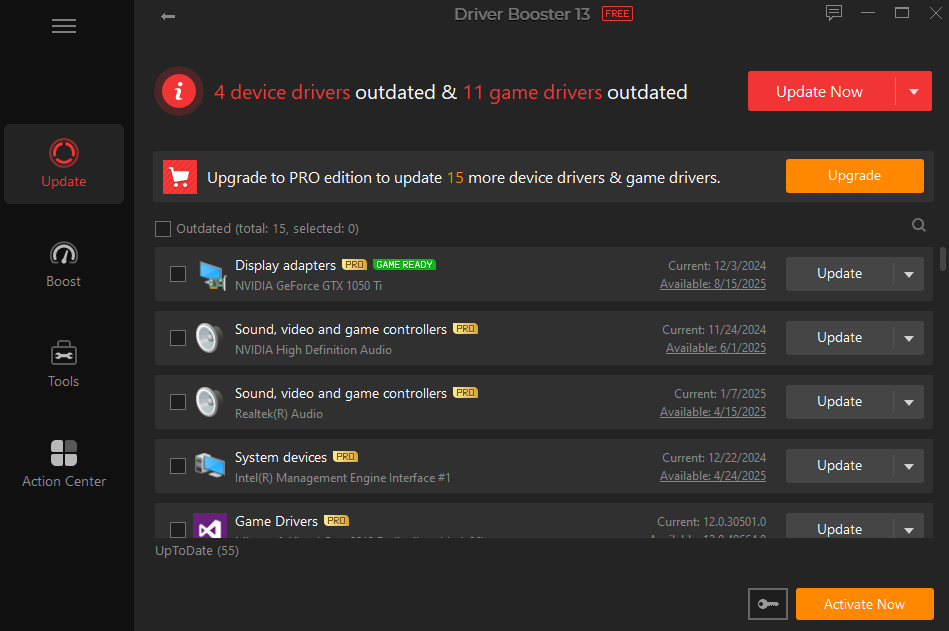
Step 3: Review Results
When the scan finishes, you’ll see a complete list of outdated or problematic drivers. Each item displays the current and new version numbers, file size, release date, and the vendor’s name.
Review the list carefully. For most users, it’s safe to update all drivers simultaneously. However, advanced users can choose to update specific ones manually if preferred. The program also flags critical drivers that directly affect system stability, ensuring you address high-priority updates first.
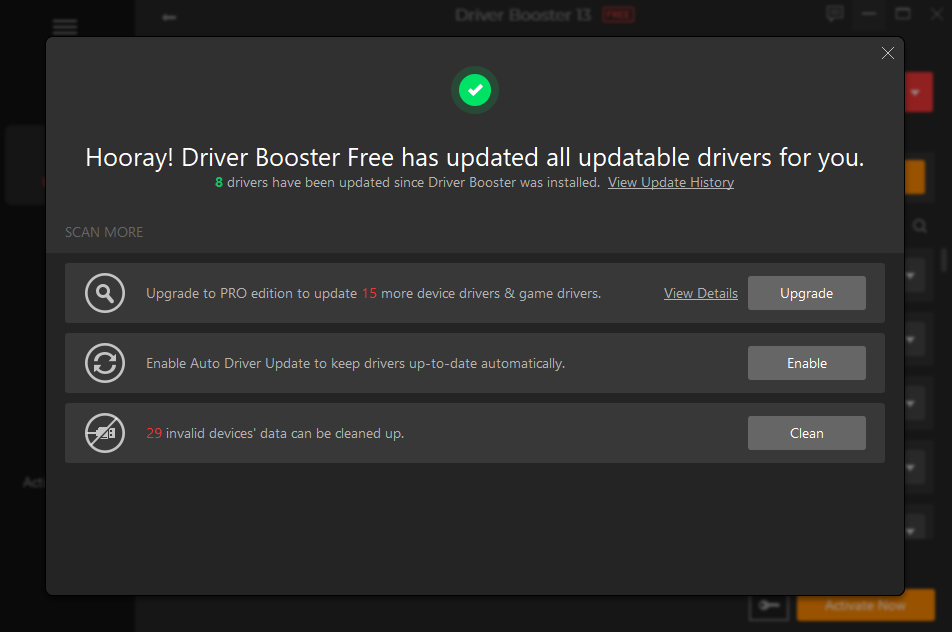
Step 4: One-Click Updates
Once you’ve reviewed the list, click the “Update Now” button to initiate the update process. Driver Booster automatically downloads and installs the latest certified drivers for your hardware.
Unlike manual driver updates that require visiting multiple manufacturer websites, this one-click solution handles everything for you. Driver Booster sources its updates from official, verified channels, minimizing the risk of incompatible or corrupted driver installations.
You can continue working during the process, as it runs quietly in the background without interrupting your workflow.
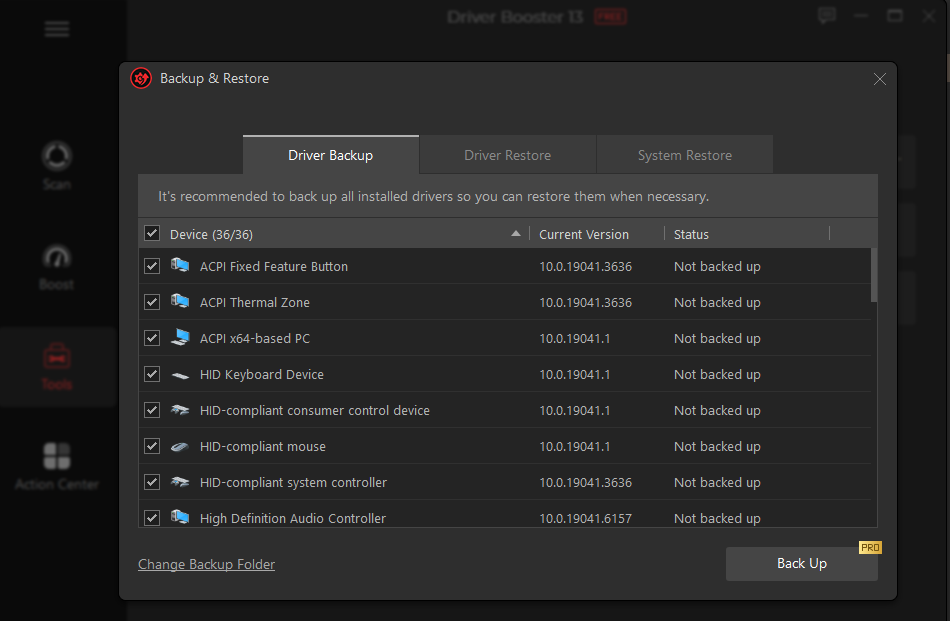
Step 5: Backup and Restore Options
Before updating, Driver Booster gives you the option to back up your existing drivers. This is a crucial safety measure, allowing you to roll back to a previous version if a new driver causes instability.
You can access backups through the “Tools” → “Driver Backup” section. Restoring an earlier version is just as simple — select the driver you wish to revert, and click “Restore.”
This built-in safeguard makes experimenting with new drivers worry-free.
Step 6: Fix Device Errors
Driver Booster isn’t just about updating drivers — it also detects and repairs device-related errors. Through the “Tools” tab, you can access features like “Fix No Sound,” “Fix Network Failure,” or “Fix Device Error.”
These utilities automatically troubleshoot and repair common Windows hardware issues caused by corrupted or missing drivers. Instead of manually diagnosing each problem, Driver Booster saves you hours of technical effort with automated fixes.
Step 7: Optimize for Gaming and AI
For gamers and creators, Driver Booster includes special optimization features that boost system performance. The Game Boost mode temporarily disables unnecessary background processes to free up system resources, improving frame rates and load times.
It also ensures that all graphics, sound, and network drivers are up-to-date for the best gaming experience. The latest version even includes AI-assisted optimizations to ensure your hardware runs efficiently under intensive workloads — from gaming to video editing and AI applications.
Step 8: Automate the Process
Once your drivers are updated, you can automate the entire maintenance routine.
Go to Settings → Scheduler → Automatically update drivers while the system is idle.
With this feature enabled, Driver Booster will routinely check for and install updates without manual input. This ensures your system stays secure and optimized around the clock.
Automatic maintenance also helps prevent potential issues before they occur — eliminating the need for constant manual checks.
Benefits of Using Driver Booster
Using Driver Booster offers numerous advantages beyond just fixing outdated drivers:
- Faster Performance: Updated drivers enhance system stability and responsiveness.
- Improved Security: Newer drivers patch vulnerabilities that hackers could exploit.
- Better Compatibility: Ensures smooth functioning of new software and games.
- Reduced Crashes: Fixes driver conflicts that can cause system instability.
- Hands-Free Updates: With automation, your PC remains updated without manual effort.
- Enhanced Gaming Experience: Game-related drivers and optimizations improve FPS and reduce lag.
- Backup Safety: Driver restore points allow easy rollback in case of problems.
Whether you’re a casual user or a professional, Driver Booster helps keep your system healthy, secure, and optimized without technical hassle.
Additional Tips and Troubleshooting
- Restart after updates: Always reboot your system after major driver updates to ensure full effect.
- Whitelist Driver Booster: Add it to your antivirus whitelist to prevent interruptions during downloads.
- Check for game components: Driver Booster also updates Visual C++, DirectX, and .NET components.
- Use Restore Points: Create a Windows restore point before mass updates as an added precaution.
- Enable Auto Scans: Schedule automatic scans weekly or monthly for proactive maintenance.
Take Control of Your System Today!
Outdated drivers can silently degrade your system’s performance and stability. With Driver Booster, you can fix all driver issues instantly and ensure your hardware always performs at its best. From automatic updates to device error repairs and gaming optimizations, it’s the all-in-one driver updater solution for hands-free maintenance.
If you’re looking to enhance system reliability, reduce crashes, and unlock your PC’s full potential — Driver Booster is the easiest and most efficient way to do it.