Brewing your own beer is one of the most rewarding hobbies for beer enthusiasts. All-grain brewing, in particular, offers unparalleled control over the flavors, aromas, and textures of your final product. But to succeed in all-grain brewing, you need the right equipment and setup. Whether you’re an aspiring homebrewer or an experienced beer maker looking to refine your craft, this guide will walk you through all the essential tools, processes, and tips to make your all-grain brewing journey a success.
[Sponsored by Micet: Premium Commercial Beer Brewing Equipment]
When it comes to reliable and high-performance brewing equipment, Micet sets the standard. With innovative designs and precision engineering, Micet’s range of commercial brewing systems is tailored for both small-scale craft brewers and large-scale beer production. If you’re looking to take your brewing to the next level, explore Micet’s exceptional brewing equipment to unlock your full potential.
What is All-Grain Brewing?
All-grain brewing is the process of brewing beer from scratch using malted grains, hops, water, and yeast. Unlike extract brewing, which uses malt extract as a base, all-grain brewing requires mashing the grains to extract fermentable sugars. This method provides brewers with greater creative control, allowing for fine-tuning of flavors, body, and aroma. However, it also requires a more comprehensive set of equipment and a deeper understanding of the brewing process.
Essential All-Grain Brewing Equipment
1. Mash Tun
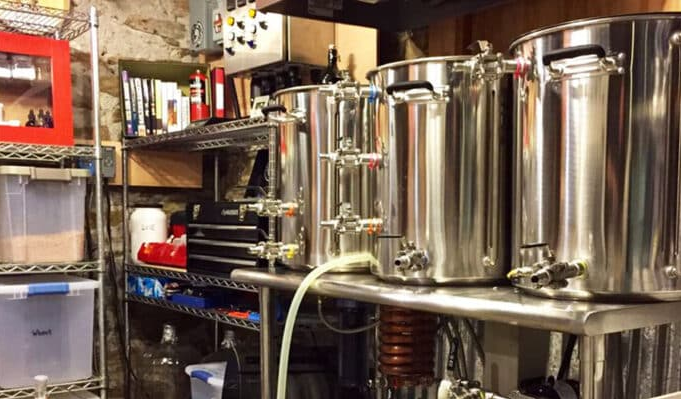
The mash tun is a critical piece of equipment for all-grain brewing. This insulated container is where crushed grains are combined with hot water to create a mash. The mash tun’s primary purpose is to maintain a consistent temperature for enzymatic conversion of starches into fermentable sugars.
- Key Features to Look For:
- Insulated walls for temperature stability.
- A false bottom or manifold for easy wort drainage.
- Sufficient capacity for the size of your brew.
2. Hot Liquor Tank (HLT)
The HLT is used to heat and store water for mashing and sparging. It ensures that you have hot water ready at the right temperatures when needed.
- Key Features to Look For:
- Precision temperature control.
- A spigot or valve for easy water transfer.
3. Boil Kettle
After the mash, the wort is transferred to the boil kettle, where it’s boiled with hops. Boiling sterilizes the wort, extracts hop flavors, and enhances the beer’s stability.
- Key Features to Look For:
- High-quality stainless steel construction for durability.
- A built-in thermometer and sight glass.
- A sufficient capacity to prevent boil-overs.
4. Wort Chiller
Rapid cooling of the wort after boiling is essential to minimize the risk of contamination and to achieve the desired clarity. Wort chillers come in two main types: immersion and plate chillers.
- Key Features to Look For:
- Efficient cooling capabilities.
- Easy cleaning and maintenance.
5. Fermentation Vessel
The fermentation vessel is where the magic happens—yeast converts sugars into alcohol and carbon dioxide. These vessels come in various materials, including glass, plastic, and stainless steel.
- Key Features to Look For:
- Airtight seal to prevent contamination.
- A built-in airlock for venting CO2.
- A conical design for easy yeast collection (optional).
6. Grain Mill
A grain mill is used to crush malted grains just before brewing. Crushing ensures that the grain husks are broken to expose the starches inside while keeping the husks mostly intact for better filtration.
- Key Features to Look For:
- Adjustable rollers for customized crush levels.
- A durable design to withstand frequent use.
7. Hydrometer or Refractometer
These tools measure the sugar content of your wort, helping you track fermentation progress and calculate alcohol content.
- Key Features to Look For:
- High accuracy.
- Ease of use and calibration.
8. Sparge Arm
A sparge arm helps evenly distribute hot water over the grain bed during sparging, ensuring maximum sugar extraction.
9. Sanitation Supplies
Keeping your equipment clean and sanitized is critical for brewing success. Use high-quality sanitizers, brushes, and cleaning agents to maintain hygiene.
Optional Upgrades for All-Grain Brewing
If you’re looking to elevate your brewing setup, consider these additional tools:
- Pump System: For transferring liquid between vessels with ease.
- Temperature Control Unit: To maintain precise fermentation temperatures.
- Automated Brewing System: For fully controlled, hands-off brewing.
Tips for Choosing the Right Equipment
- Scale Appropriately: Choose equipment based on your brewing goals. For beginners, a 5-gallon setup may suffice, but commercial brewers may require larger systems.
- Invest in Quality: Durable, stainless steel equipment is often worth the extra cost. It lasts longer and ensures consistent performance.
- Plan for Expansion: If you anticipate scaling up your production, invest in equipment that can grow with your needs.
Brewing Your First Batch
Once your equipment is set up, the process generally involves the following steps:
- Mashing: Combine crushed grains with water in the mash tun and maintain a steady temperature.
- Sparging: Rinse the grain bed with hot water to extract additional sugars.
- Boiling: Transfer the wort to the boil kettle, add hops, and boil for 60-90 minutes.
- Cooling: Use a wort chiller to bring the wort down to fermentation temperature.
- Fermentation: Transfer the cooled wort to a fermentation vessel, pitch the yeast, and let it ferment.
- Packaging: Once fermentation is complete, bottle or keg your beer for carbonation and storage.
FAQs
1. Do I need all the equipment to start brewing all-grain beer?
While all the equipment listed above enhances the process, beginners can start with a basic mash tun, boil kettle, and fermentation vessel. Over time, you can invest in additional tools as your brewing skills grow.
2. How much does it cost to set up an all-grain brewing system?
Costs vary depending on the scale and quality of the equipment. A basic homebrewing setup may cost $300-$500, while commercial systems can range from $5,000 to over $50,000.
3. What is the difference between batch sparging and fly sparging?
Batch sparging involves adding water to the mash tun in batches, while fly sparging uses a continuous flow of water. Fly sparging is more efficient but requires additional equipment like a sparge arm.


