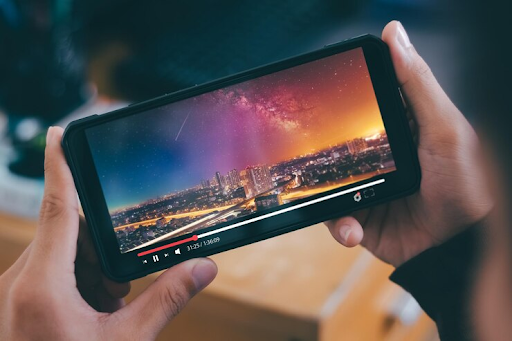
Video streaming has become a cornerstone of mobile app development, with users consuming content on a variety of devices. To cater to both iOS and Android users without developing separate native applications, developers are increasingly turning to cross-platform frameworks like React Native. React Native video SDK allows you to build one app that runs smoothly on both platforms, saving time and resources.
In this guide, we’ll explore how to build a cross-platform video streaming app using React Native and integrate a video player to ensure smooth, high-quality streaming across all devices.
1. Why Choose React Native for Video Streaming?
React Native is a popular choice for cross-platform app development because it enables you to write a single codebase that works across both iOS and Android. This offers several advantages for video streaming apps:
- Cost-Effective Development: With one codebase, you reduce the time and cost of development and maintenance.
- Faster Time to Market: Developing a single app for both platforms accelerates your launch timeline.
- Native Performance: Despite being a cross-platform framework, React Native offers performance levels close to native apps, thanks to its integration with native components.
These advantages make React Native a top choice for developers building video apps that need to deliver consistent performance across multiple platforms.
2. Setting Up Your Development Environment
Before you start building your video streaming app, you’ll need to set up your development environment. Here are the key tools you’ll need:
- Node.js and npm: React Native depends on Node.js for package management.
- React Native CLI: You can install the React Native CLI globally via npm.
- Xcode (for iOS development): For testing your app on iOS devices, you’ll need to have Xcode installed.
- Android Studio (for Android development): For testing on Android devices, Android Studio is necessary.
Once your development environment is set up, create a new React Native project using the CLI:
bash
Copy code
npx react-native init VideoStreamingApp
This will generate the basic structure of your React Native app.
3. Choosing a React Native Video Player
To integrate video streaming capabilities into your React Native app, you’ll need to choose a react native video player that supports both iOS and Android platforms. One of the most popular options is the react-native-video library, which provides a React component for playing videos on both platforms.
Install the react-native-video package in your project by running:
bash
Copy code
npm install react-native-video
This library supports various video formats, including MP4, HLS (HTTP Live Streaming), and DASH (Dynamic Adaptive Streaming over HTTP). It also offers essential features such as play/pause controls, fullscreen mode, and playback progress tracking.
4. Adding the Video Player to Your App
After installing react-native-video, you can add a video player to your app’s UI by importing the component and defining the video source. For example:
javascript
Copy code
import React from ‘react’;
import { View } from ‘react-native’;
import Video from ‘react-native-video’;
const VideoPlayer = () => {
return (
<View style={{ flex: 1 }}>
<Video
source={{ uri: ‘https://example.com/video.mp4’ }}
style={{ width: ‘100%’, height: 200 }}
controls={true}
resizeMode=”contain”
/>
</View>
);
};
export default VideoPlayer;
This simple code snippet creates a video player that can stream a video from a URL. You can customize the player’s appearance, including adding controls for play/pause, adjusting volume, and toggling fullscreen mode.
5. Supporting Multiple Video Formats
For a more versatile video streaming app, you’ll want to support multiple video formats, such as MP4, HLS, and live streaming formats. The react-native-video player is flexible enough to handle these formats, but you need to ensure your video files are encoded properly.
- MP4: This format is widely supported and ideal for pre-recorded video content.
- HLS: For adaptive streaming, use HLS Streaming, which adjusts video quality based on the user’s network conditions.
- Live Streaming: If your app requires live video streaming, you can configure the player to support live streams with low-latency settings.
By supporting a variety of formats, your app can cater to different use cases, from on-demand video to live broadcasting.
6. Ensuring Video Security
If your app delivers premium content, video security is a priority. Implementing secure streaming practices like encryption and Digital Rights Management (DRM) will prevent unauthorized access to your content.
- DRM: Technologies like FairPlay (for iOS) and Widevine (for Android) are essential for protecting content. They encrypt your video files and restrict playback to authorized users.
- Token-based Authentication: Secure your video URLs by requiring users to authenticate before accessing the content.
- HTTPS: Always use HTTPS for video delivery to ensure the data is transmitted securely.
By adding these security measures, you can safeguard your content and protect your business from video piracy.
7. Optimizing Performance and User Experience
Video streaming apps are resource-intensive, so optimizing for performance is crucial. Here are a few best practices to ensure smooth playback and a great user experience:
- Adaptive Bitrate Streaming: Automatically adjust the video quality based on the user’s internet speed to reduce buffering.
- Preload Videos: Preload video content to minimize load times and ensure smooth playback, especially on slower networks.
- Use a CDN: Distribute your video content through a Content Delivery Network (CDN) to minimize latency and deliver videos efficiently to global users.
8. Testing Across Devices
Before launching your app, test it on a wide range of devices to ensure compatibility and consistent performance. React Native makes this easier by allowing you to test on both Android and iOS devices from a single codebase. Check for issues such as buffering, playback quality, and UI responsiveness across different screen sizes and network conditions.
9. Launching and Gathering Feedback
Once your app is fully tested, you’re ready to publish it on app stores like Google Play and the Apple App Store. However, app development doesn’t stop after launch. Gather user feedback to understand how your app performs in real-world conditions and where improvements can be made. Regular updates that address bugs and introduce new features will keep your app relevant and competitive.
Conclusion
Building a cross-platform video streaming app using React Native and integrating a video player is a cost-effective and efficient solution for developers targeting both iOS and Android users. By leveraging a powerful video player like react-native-video and following best practices for video security and performance, you can deliver a high-quality, seamless video experience to your users.
Whether you’re developing a live streaming service, an educational platform, or an entertainment app, React Native provides the flexibility and performance needed to create engaging, cross-platform video streaming applications.


