Introduction
Laser engraving has transformed wood crafting, allowing for intricate designs, precision, and speed. It enables anyone from hobbyists to professional craftsmen to personalize items, make art, or enhance products with unique patterns, all while minimizing waste. The versatility of laser engraving opens doors to endless creative possibilities.
Selecting the Right Wood
Not all wood types engrave equally. Key considerations include:
- Hardwoods (e.g., maple, oak): Offer durability and fine detail but may require higher power settings.
- Softwoods (e.g., pine, cedar): Easier to engrave but may produce uneven results due to the grain.
- Plywood and MDF: Provide a smooth surface but contain adhesives that can create fumes.
Tip: Opt for woods with consistent grain for detailed designs.
Preparing the Design
Before engraving, create or adapt a design suitable for wood. Considerations include:
- Size and Complexity: Small, detailed designs need higher precision and may require slower speeds.
- Contrast and Depth: Designs with good contrast tend to stand out better.
Popular design software options include Adobe Illustrator, CorelDRAW, and LaserGRBL, each allowing you to experiment with shapes, text, and patterns before engraving.
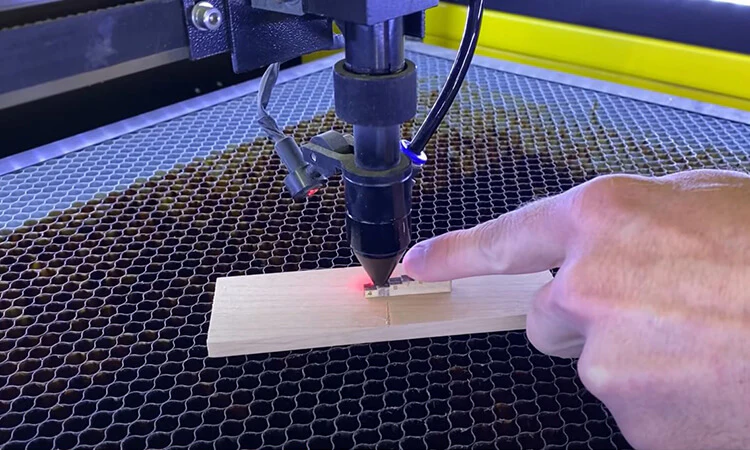
Setting Up the Laser Engraving Machine
Setting up the machine correctly is crucial for safe and effective engraving:
- Positioning: Secure the wood flatly to avoid movement during the process.
- Adjusting Settings: Calibrate the laser power and speed according to the wood type. Machines like those from OMTech are known for their customizable settings and reliable precision, making it easier to adjust power levels, especially on softer woods, to prevent burning.
- Safety Precautions: Ensure the area is well-ventilated, and always wear eye protection.
OMTech laser cutters offer powerful performance for wood projects and are widely valued for their durability and accuracy, making them an excellent choice for both beginners and pros.
Test Runs and Calibration
Performing test runs on scrap pieces helps avoid costly mistakes. Calibrate by adjusting:
- Power: Higher power increases burn depth but may char the wood.
- Speed: Slower speeds often provide more precise engravings.
- Focus: Ensuring the laser is focused correctly will produce sharper lines.
Testing and adjusting these variables based on the wood type and design needs can make a significant difference.
Executing the Engraving
With the machine set up, it’s time to start engraving:
- Loading the Design: Use your software to send the design to the laser cutter.
- Monitoring the Process: Watch the engraving closely, especially on the first run. Ensure the wood isn’t shifting or burning excessively.
- Cooling Period: Allow a few seconds of cooling between passes on thicker wood, preventing excessive heat buildup.
Post-Engraving Finishing Touches
After engraving, finishing touches can elevate the quality of your work:
- Sanding: Light sanding can remove scorch marks around the edges.
- Staining or Sealing: Applying a stain or clear coat can enhance the wood’s appearance and protect the engraving.
- Cleaning: Use a soft brush or cloth to remove any residual wood dust.
These steps help your design stand out while also adding durability.
Applications and Creative Ideas
Laser engraving has various applications, from functional items to art pieces:
- Signage: Personalized signs for homes or businesses.
- Decorative Art: Engrave detailed designs on wood for unique wall art.
- Customized Gifts: Make memorable gifts with names, dates, or special messages engraved.
- Product Enhancements: Businesses can add logos or branding to wood products like cutting boards, coasters, and furniture.
These ideas inspire both personal and commercial projects, enhancing creativity and functionality.
Conclusion
Laser engraving wood is a rewarding process that combines technology with craftsmanship. From selecting the right wood to mastering laser settings and finishing touches, this guide provides the foundation for creating beautiful engraved pieces. Whether for personal projects or business, laser engraving opens a world of design possibilities.