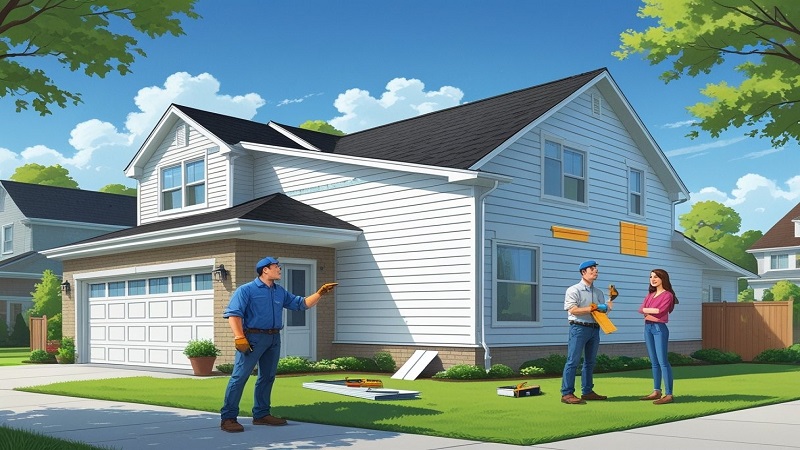
Purchasing a first home represents a significant milestone, and maintaining that investment requires understanding essential exterior upgrades like siding installation. For first-time homeowners in Columbus, navigating the siding installation process can feel overwhelming without proper guidance. The local climate, with its humid summers and cold winters, makes selecting and installing appropriate siding crucial for protecting the home’s structure and maintaining its value.
Professional siding installation in Columbus typically takes one to two weeks from start to finish, depending on the home’s size and the material selected. The process involves careful planning, material selection suited to Ohio’s weather patterns, and precise installation techniques that account for temperature fluctuations throughout the year. Many homeowners underestimate the complexity of proper siding installation, which can lead to costly mistakes if approached without adequate knowledge.
Understanding what happens during each phase of a siding project helps homeowners make informed decisions and set realistic expectations. From selecting materials that balance durability with budget considerations to knowing when professional expertise becomes necessary, first-time homeowners benefit from learning the fundamentals before beginning their project.
Choosing the Right Siding for Your Columbus Home
Selecting the right siding material involves balancing durability, appearance, energy performance, and budget while accounting for Columbus’s distinct seasonal weather patterns. Different materials offer varying levels of protection, maintenance requirements, and aesthetic options that affect both immediate costs and long-term value.
Key Types of Siding Materials
Vinyl siding remains the most popular choice among Columbus homeowners, priced around $3.47 per square foot. It resists moisture, won’t rot or warp, and comes in numerous colors and styles that maintain their appearance without painting.
Fiber cement siding, particularly James Hardie fiber cement siding, provides superior durability and fire resistance. This material mimics the look of wood while withstanding harsh weather conditions better than natural wood products. It costs more upfront but offers exceptional longevity.
Wood siding delivers authentic natural beauty and traditional charm. Cedar and pine are common choices, though they require regular maintenance including staining or painting every few years to prevent decay.
Engineered wood siding combines wood fibers with resins to create a more stable product than solid wood. It offers better moisture resistance while maintaining a wood-like appearance at a lower cost than traditional wood siding.
Comparing Durability, Curb Appeal, and Energy Efficiency
Durability varies significantly across siding options. Fiber cement siding can last 50 years or more with minimal maintenance, while vinyl typically lasts 20-30 years. Wood siding requires the most upkeep but can last decades when properly maintained.
Curb appeal depends on personal preference and home style. James Hardie fiber cement siding offers texture and depth that closely resembles wood. Vinyl provides clean lines and consistent color, while natural wood siding creates warmth and character.
Energy efficiency affects heating and cooling costs. Insulated vinyl siding and fiber cement options reduce thermal transfer through exterior walls. Adding foam backing or choosing thicker materials improves a home’s R-value, leading to lower utility bills throughout the year.
Weather Considerations for Columbus
Columbus experiences hot, humid summers and cold winters with snow and ice. These conditions demand siding material that handles temperature fluctuations without cracking or warping.
Vinyl siding expands and contracts with temperature changes, making proper installation critical to prevent buckling. Fiber cement remains dimensionally stable across seasons and resists damage from freeze-thaw cycles.
Moisture management is essential in Central Ohio’s climate. Heavy spring rains and winter precipitation require exterior siding that prevents water infiltration. Fiber cement and vinyl both shed water effectively when installed with proper flashing and drainage planes.
Evaluating Costs and Maintenance
Initial installation costs vary by material choice:
- Vinyl: $3.50-$8.00 per square foot installed
- Fiber cement: $8.00-$12.00 per square foot installed
- Wood: $8.00-$15.00 per square foot installed
- Engineered wood: $6.00-$10.00 per square foot installed
Maintenance requirements impact long-term expenses. Vinyl needs occasional washing but no painting. Fiber cement requires repainting every 10-15 years, while wood siding demands staining or painting every 3-7 years.
A siding project represents a significant exterior upgrade that protects structural components from weather damage. Homeowners should calculate total ownership costs over the expected lifespan rather than focusing solely on installation prices. Lower-maintenance materials like vinyl and fiber cement often prove more economical despite higher initial investments.
Step-by-Step Siding Installation Process Explained
Installing siding involves careful preparation, proper material selection, and precise installation techniques to protect the home and enhance its appearance. Each phase builds on the previous one, from gathering tools to securing the final panels in place.
Essential Tools and Materials Needed
A successful vinyl siding installation requires specific tools and materials before work begins. Homeowners need basic hand tools including a utility knife for cutting moisture barriers, tin snips for trimming vinyl siding panels, and a chalk line for marking level reference points.
Specialized equipment makes the job easier and more accurate. A zip tool removes interlocked siding panels during repairs or adjustments. A power saw with a fine-tooth blade cuts vinyl siding cleanly, though installers should cut with the finished side down to prevent chipping.
Material requirements include the vinyl siding panels themselves, along with starter strips that provide the base for the first row. J-channels frame windows and doors, while corner posts cover vertical edges. House wrap serves as the weather-resistant barrier beneath the siding.
Safety equipment matters as much as installation tools. Ladders must be sturdy and properly positioned. Work gloves protect hands from sharp edges, and safety glasses prevent debris from causing eye injuries during cutting operations.
Preparing Your Home and Removing Old Siding
The first step involves removing old siding carefully to avoid damaging the underlying structure. Workers start at the top and work downward, using a zip tool to unlock vinyl panels or pry bars for other siding types. All nails must be extracted completely to create a smooth surface.
After removal, installers inspect the wall sheathing for water damage, rot, or structural issues. Damaged sections require repair before proceeding. The wall surface should be clean, dry, and level to ensure proper adhesion of the moisture barrier.
This preparation phase also includes removing and reinstalling exterior fixtures. Light fixtures, outlet covers, and shutters come off temporarily. Downspouts may need repositioning to accommodate the new siding thickness.
Installing Moisture Barriers and Accessories
A weather-resistant barrier goes up before any siding panels. House wrap attaches directly to the wall sheathing, overlapping seams by at least six inches. Installers start at the bottom and work upward, ensuring water runs down and away from the structure.
All seams must be taped with specialized house wrap tape to prevent moisture infiltration. The barrier should wrap around corners and cover the entire wall surface without gaps. Proper installation of this moisture barrier protects the home from water damage and improves energy efficiency.
Corner posts install next, positioned vertically at each outside and inside corner. These posts must be plumb and extend from the starter strip to just below the soffit and fascia. J-channels go around windows, doors, and other openings to create finished edges.
The starter strip attaches along the bottom of the wall using a chalk line to ensure it’s level. This piece locks the bottom edge of the first row of siding. Proper positioning of starter strips determines whether the entire installation appears straight and professional.
Proper Vinyl Siding Installation Techniques
Installing siding begins with the first panel snapping into the starter strip. Each panel overlaps the previous one by approximately one inch, and installers nail through the center of the nailing slots. Nails should not be driven tight—leaving a 1/32-inch gap allows for thermal expansion.
Panels must hang from the nails rather than being forced upward into the locking mechanism. Overdriving nails or forcing panels too tightly causes buckling when temperatures change. Each row should align horizontally using the chalk line as a reference point.
Siding around windows requires careful measuring and cutting. J-channels frame each opening, and panels are cut to fit precisely within these channels. The utility knife scores the vinyl for clean breaks on smaller cuts, while power tools handle longer cuts.
Professional siding installation maintains consistent overlap patterns and avoids vertical seam alignment between rows. Offset seams by at least 24 inches from row to row for better appearance and weather protection. Each panel locks securely into the one below it before nailing.